Nu we in quarantaine zitten ben ik maar weer begonnen met haken. Dat had ik al een tijd niet meer gedaan. Maar het haken helpt om mijn zinnen even te verzetten als mijn gedachten overuren maken. Ik wilde wat leuks haken dat je aan iemand kunt geven om hen te laten weten dat je aan hen denkt.
Now that we are in quarantine I started crocheting again. I hadn't been doing that in a while. But crocheting helps to calm my mind when my thoughts are running wild. I wanted to crochet something nice that you could give to someone to let them know you were thinking about them.
Deze bloemetjes zijn van mijn haaknaald gerold. Zijn ze niet vrolijk? Dat fleurt toch iedereen op? =) Ze zijn gehaakt met Catania katoen op haaknaald 3. Ze passen precies in mijn handpalm. Nu we elkaar geen hand meer mogen geven is het fijn om toch even iets tastbaars in je hand te hebben, terwijl je weet dat er iemand aan je dacht. Het patroontje is te koop in mijn Etsy shop: 7amaraArt.etsy.com
I made these flowers. Aren't they cheerful? Wouldn't they put a smile on anyone's face? =) They are crocheted with Catania cotton and a 3.0 mm hook. They fit exactly in the palm of my hand. Now that we are not allowed to shake hands anymore, it is nice to feel something in your hand, while knowing that someone was thinking about you. The pattern is for sale in my Etsy shop: 7amaraArt.etsy.com
Posts tonen met het label crochet. Alle posts tonen
dinsdag 14 april 2020
zondag 10 maart 2019
Flowers
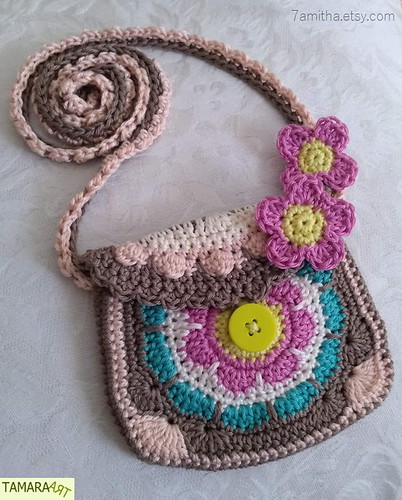
Dit schattige tasje heb ik dit weekend gemaakt. Ik heb er nog wat extra bloemetjes bij gedaan, zodat het allemaal nog wat fleuriger werd. Het patroontje van het tasje heb ik zelf ontworpen en is te koop via: 7amitha.etsy.com
This weekend I made this cute purse. I added a few extra flowers, to make it even more flowery. The pattern of the purse is my own design and can be purchased at: 7amitha.etsy.com
De extra bloemetjes zijn simpel te maken.
Bloemetje met 4 blaadjes:
1. Verstelbare ring met 6 v
2. 2 v in elke steek
3. (1 hv - 1 hst, 3 stk, 1 hst in één steek - 1 hv) 4x
Bloemetje met 5 blaadjes:
1. Verstelbare ring met 7 v
2. 2 v in elke steek
3. (1 hv - 1 hst, 3 stk, 1 hst in één steek - 1 hv) 5x
The extra flowers are easy to make.
Flower with 4 petals:
1. Adjustable ring with 6 sc
2. 2 sc in every stitch
3. (1 sl st - 1 hdc, 3 dc, 1 hdc in one stitch - 1 sl st) 4x
Flower with 5 petals:
1. Adjustable ring with 7 sc
2. 2 sc in every stitch
3. (1 sl st - 1 hdc, 3 dc, 1 hdc in one stitch - 1 sl st) 5x
zaterdag 9 december 2017
Gehaakte haarbanden
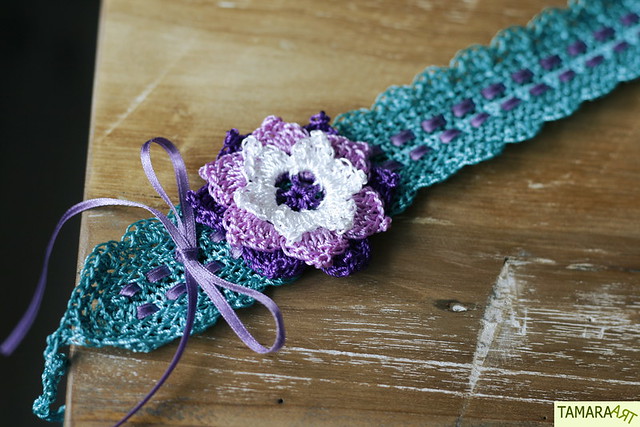
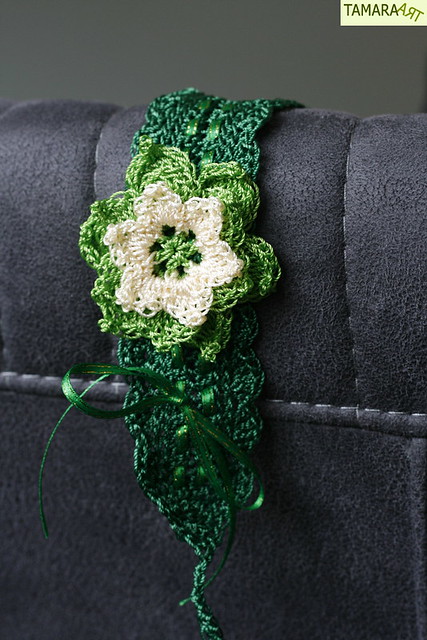
Deze haarbanden heb ik op speciaal verzoek gemaakt. =) Ze zijn gehaakt met nylon garen.
These headbands were a special order. =) I crocheted them with nylon yarn.
Het patroontje is van | The pattern is by: CrochetbyMarianneS
These headbands were a special order. =) I crocheted them with nylon yarn.
Het patroontje is van | The pattern is by: CrochetbyMarianneS
zaterdag 25 november 2017
Sassa van Het Zandkasteel
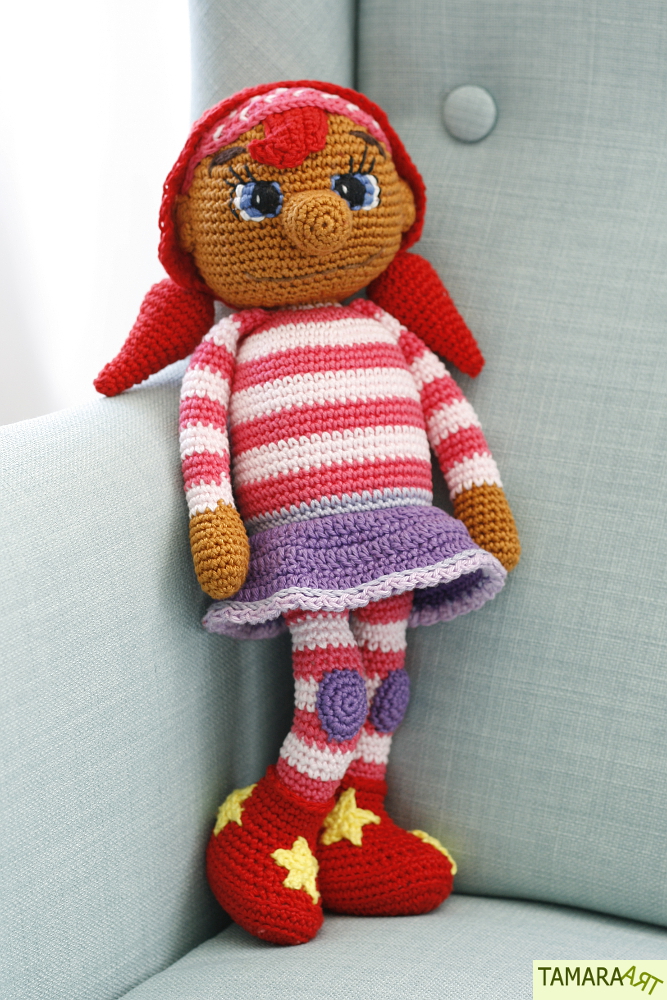
Mijn kleine nichtje is gek op Het Zandkasteel, en daarom moest ik voor haar natuurlijk wel even een Sassa-pop haken. :)
'The Sand Castle' is a really popular tv show for toddlers here in Holland. And my little niece loves it. So I just had to crochet a Sassa doll for her. :)
Ik had geen patroon van Sassa, dus ik heb een patroon van een andere pop als basis gebruikt, en die aangepast om Sassa te maken.
I didn't have a Sassa pattern. So I used the pattern of a different doll as a basis, and changed it to make Sassa.
Het heeft heel wat tijd gekost om de pop te maken. Ik ben er in totaal wel een jaar mee bezig geweest. (al moet ik eerlijk bekennen dat ze ook wel een tijdje als w.i.p. in een hoekje heeft gezeten als het even niet meer lukte..)
It took quite some time to make this doll. All together I've been working on it for a year. (although I have to admit that she's also been put aside as a w.i.p. whenever I got stuck..)
Vooral de ogen waren lastig, en heb ik wel honderd keer opnieuw moeten doen voordat ik tevreden was.
Especially the eyes were difficult to, I re-did them about a hundred times before I was happy with them.
Toen ze eindelijk klaar was gaf ik haar aan mijn nichtje. Ze was er erg blij mee! Ze gaf haar een dikke knuffel en danste met haar de kamer rond! =)
When she was finally finished I gave her to my niece. She was really happy with it! She gave her a big hug, and danced around the living room! =)
En kijk eens wie ze op de televisie zagen?! | And look who they saw on tv?!
Sassa!
maandag 24 juli 2017
Warm hugs
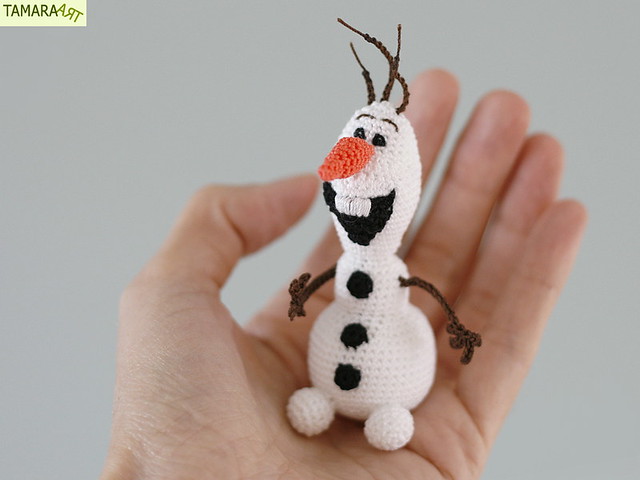
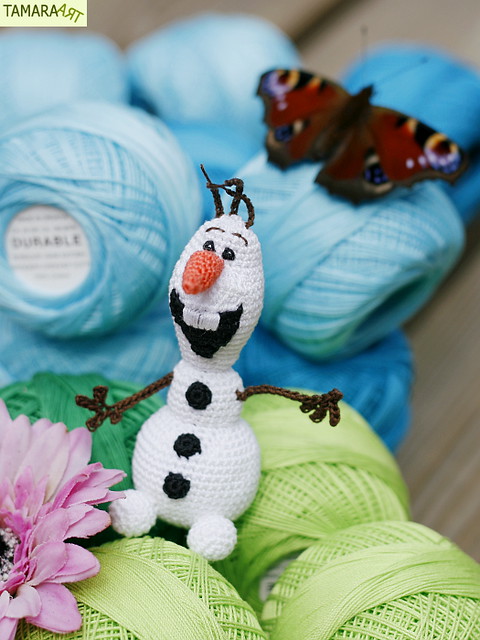
Hi everyone, I'm Olaf, and I like warm hugs!
Mijn kleine nichtje is deze week jarig. Ze is gek op Olaf, en ze speelt heel veel met poppenhuizen/playmobil. Dus ik dacht, laat ik eens een klein Olafje op playmobilformaat voor haar maken.
This week it will be my little niece's birthday. She's crazy about Olaf, and she loves to play with doll houses/playmobil. So I thought, let me make a small, playmobil size, Olaf for her.
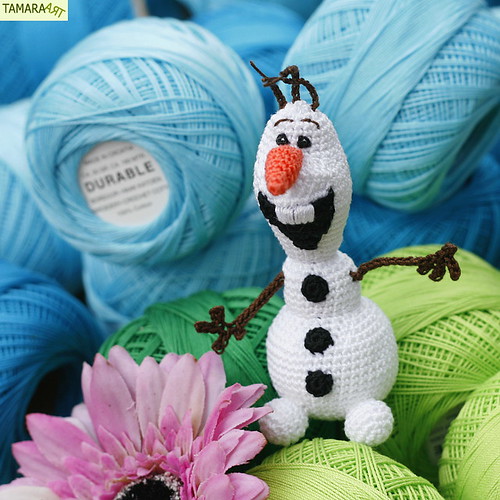
Omdat het zo klein moest heb ik heel dun garen gebruikt (Durable), en haaknaald 1.5 mm. Ik dacht dat ik Olaf in één middag wel ongeveer klaar zou hebben.
Since it had to be so small, I used a very thin thread (Durable), and crochet hook 1.5 mm. I thought I would be able to finish Olaf in one afternoon.
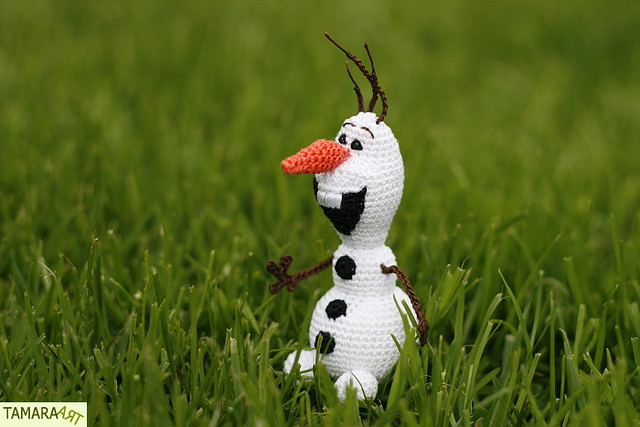
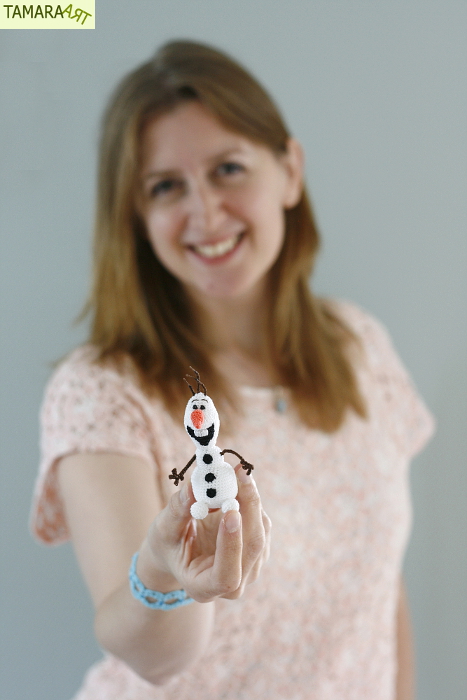
Nou, niet dus. Ik ben er zowat een hele week mee bezig geweest... Het was toch wel heel bewerkelijk. En op zo'n klein formaat valt het niet mee al die kleine onderdeeltjes vast te naaien. Maar, het is gelukt! Vandaag was hij klaar! We hebben gelijk maar even een fotoshoot gedaan.
Well, I was wrong. I've been working on it all week... There were quite some details to make. And at this small size it was not easy to sew everything together. But, I did it! I finished Olaf today! And I took him outside for a photoshoot.
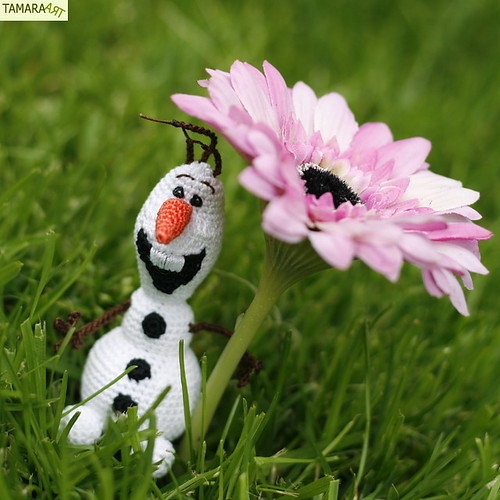
En toen Olaf zo mooi model stond, kwam er zelfs nog even een mooie vlinder bij poseren. =)
And while Olaf was posing, a beautiful butterfly decided it wanted to be in the shot as well. =)
Olaf is 7,5 cm groot geworden (de haren niet meerekend). Prima formaat voor in het poppenhuis dus! Ik zal hem deze week aan mijn nichtje geven. Ik ben heel benieuwd wat ze er van zal vinden!
Olaf is 7.5 cm tall (I didn't measure the hair). So he's at a perfect doll house size! I'm going to be giving him to my niece this week. I hope she'll like him!
Om Olaf te maken heb ik een gratis patroon gebruikt van One Dog Woof. Het is Engels, maar heel duidelijk omschreven! En eigenlijk ook het mooiste Olafpatroon dat ik op internet kon vinden! (Heel erg bedankt voor het delen Chiwei!) Do you want to build a snowman? Je vindt het patroontje op www.1dogwoof.com
To make Olaf, I used a free pattern by One Dog Woof. It is the best looking Olaf pattern I could find! (Thank you so much for sharing Chiwei!) Do you want to build a snowman? You can find the pattern at www.1dogwoof.com
Mijn kleine nichtje is deze week jarig. Ze is gek op Olaf, en ze speelt heel veel met poppenhuizen/playmobil. Dus ik dacht, laat ik eens een klein Olafje op playmobilformaat voor haar maken.
This week it will be my little niece's birthday. She's crazy about Olaf, and she loves to play with doll houses/playmobil. So I thought, let me make a small, playmobil size, Olaf for her.
Omdat het zo klein moest heb ik heel dun garen gebruikt (Durable), en haaknaald 1.5 mm. Ik dacht dat ik Olaf in één middag wel ongeveer klaar zou hebben.
Since it had to be so small, I used a very thin thread (Durable), and crochet hook 1.5 mm. I thought I would be able to finish Olaf in one afternoon.
Nou, niet dus. Ik ben er zowat een hele week mee bezig geweest... Het was toch wel heel bewerkelijk. En op zo'n klein formaat valt het niet mee al die kleine onderdeeltjes vast te naaien. Maar, het is gelukt! Vandaag was hij klaar! We hebben gelijk maar even een fotoshoot gedaan.
Well, I was wrong. I've been working on it all week... There were quite some details to make. And at this small size it was not easy to sew everything together. But, I did it! I finished Olaf today! And I took him outside for a photoshoot.
En toen Olaf zo mooi model stond, kwam er zelfs nog even een mooie vlinder bij poseren. =)
And while Olaf was posing, a beautiful butterfly decided it wanted to be in the shot as well. =)
Olaf is 7,5 cm groot geworden (de haren niet meerekend). Prima formaat voor in het poppenhuis dus! Ik zal hem deze week aan mijn nichtje geven. Ik ben heel benieuwd wat ze er van zal vinden!
Olaf is 7.5 cm tall (I didn't measure the hair). So he's at a perfect doll house size! I'm going to be giving him to my niece this week. I hope she'll like him!
Om Olaf te maken heb ik een gratis patroon gebruikt van One Dog Woof. Het is Engels, maar heel duidelijk omschreven! En eigenlijk ook het mooiste Olafpatroon dat ik op internet kon vinden! (Heel erg bedankt voor het delen Chiwei!) Do you want to build a snowman? Je vindt het patroontje op www.1dogwoof.com
To make Olaf, I used a free pattern by One Dog Woof. It is the best looking Olaf pattern I could find! (Thank you so much for sharing Chiwei!) Do you want to build a snowman? You can find the pattern at www.1dogwoof.com
dinsdag 2 augustus 2016
Back to crochet
De afgelopen weken heb ik mijn frivolité spoeltjes aan de kant gelegd en mijn haaknaald weer opgepakt! Voor mijn twee nichtjes heb ik deze biggetjes gemaakt. Ik heb hier een gratis patroontje voor gebruikt. Ik vond ze zelf erg leuk om te maken, dus er volgen vast nog wel meer. =)
The past weeks I've put my tatting shuttles aside and picked up my crochet hook again! I made these littles piglets for my two nieces. I used a free pattern. I really liked crocheting them, so I'll probably be making more in the future. =)
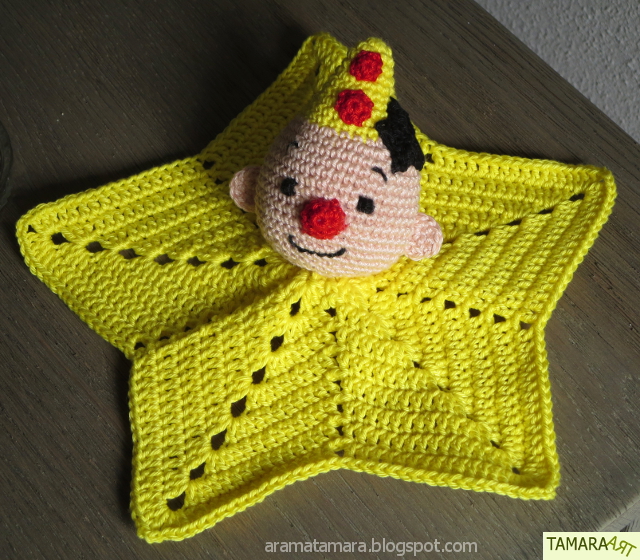
Voor mijn babyneefje heb ik dit Bumba knuffeldoekje gemaakt. Het patroontje van het hoofdje had ik hier gevonden, het doekje heb ik gemaakt volgens het patroon van een 5 point star ripple afghan.
I made this Bumba lovely for my baby nephew. I used this pattern for the head, the blanket part is a 5 point star ripple afghan.
En ja, toen vond mijn nichtje de Bumba van haar broertje zóoo lief... Dus toen heb ik er ook nog maar één voor haar gemaakt.
But then my niece thought her brother's Bumba was sooo sweet... So I made another one for her.
Ik krijg veel vragen naar een patroon voor deze Bumba. Maar ik heb geen patroon gebruikt, en ik heb ook niet bijgehouden wat ik precies heb gedaan. Dus ik heb hiervan helaas geen patroon om te delen.
Many people are asking me for the pattern of this Bumba. But I didn't use a pattern, and unfortunately I also didn't keep track of what I was doing. So I'm sorry, but I don't have a pattern to share.
zaterdag 28 november 2015
Sinterkerst-actie Catania katoen!
Speciaal voor de Catania liefhebbers hebben we nu een hele mooie actie bij Tamitha! Je ontvangt namelijk 10% korting op je bestelling van dit mooie glanskatoen!
Surf snel naar www.tamitha.nl en sla je slag! =)
dinsdag 6 oktober 2015
Nog twee =)
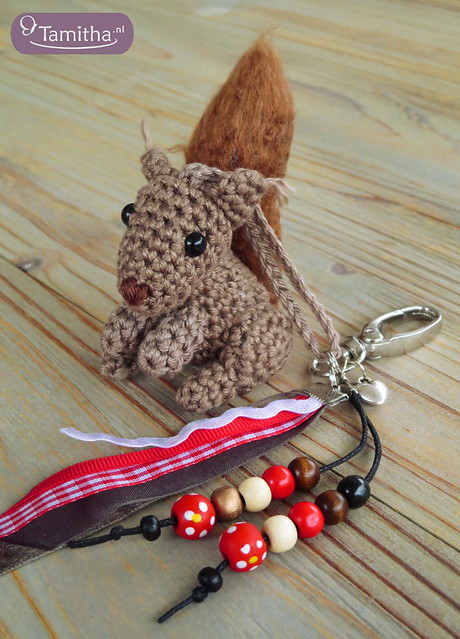
Er zijn weer twee tashangers klaar! Deze gaan straks mee naar onze stand bij Jouw Marktkraam in Drachten, daarover binnenkort meer!
I finished two more key holders! I will take these to our stand at Your Marketplace in Drachten, I'll share more about that soon!
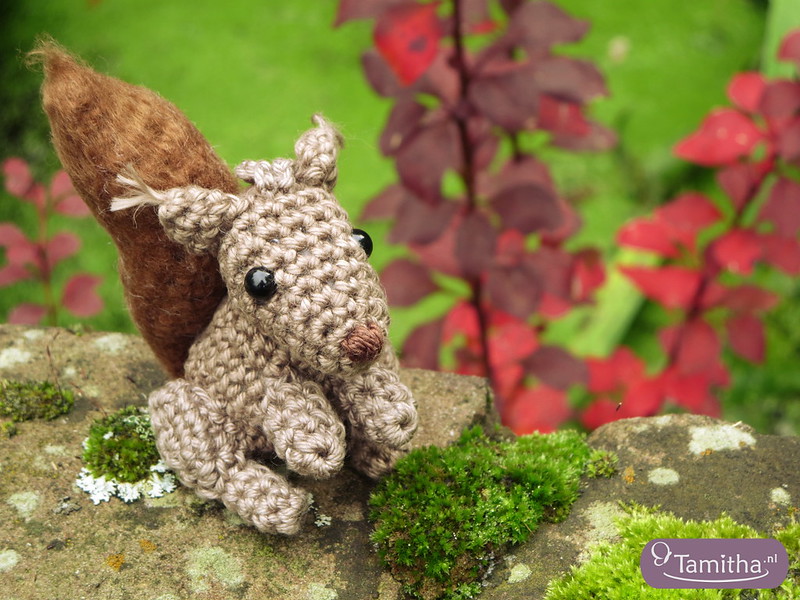
Het patroon van het eekhoorntje kun je gratis downloaden.
You can download the squirrel pattern for free.
Het patroontje van dit schattige eendje kun je bestellen bij Woolytoons.
You can order this cute little duck's pattern at Woolytoons.
(unfortunately only available in Dutch)
maandag 5 oktober 2015
Herfst!
Ben je nog op zoek naar iets leuks om te haken voor de herfst? Wat dacht je van dit eekhoorntje? Je kunt het patroontje gratis downloaden. =)
Are you looking for something cute to crochet this fall season? What do you think of this little squirrel? You can download this pattern for free. =)
vrijdag 18 september 2015
Laatste bestellingen klaar!
Miauw! =)
Deze bestelling lag al heel (héél) lang half afgemaakt in mijn WIP mandje... Deze week heb ik hem eindelijk helemaal afgemaakt. Ze waren besteld door een collega, die zei dat ik rustig de tijd kon nemen. Gelukkig maar. =)
This order has been in my WIP basket for a long (looong) time... I finally got to finish it this week. My colleague ordered them, and she told me to take all the time I needed, fortunately. =)
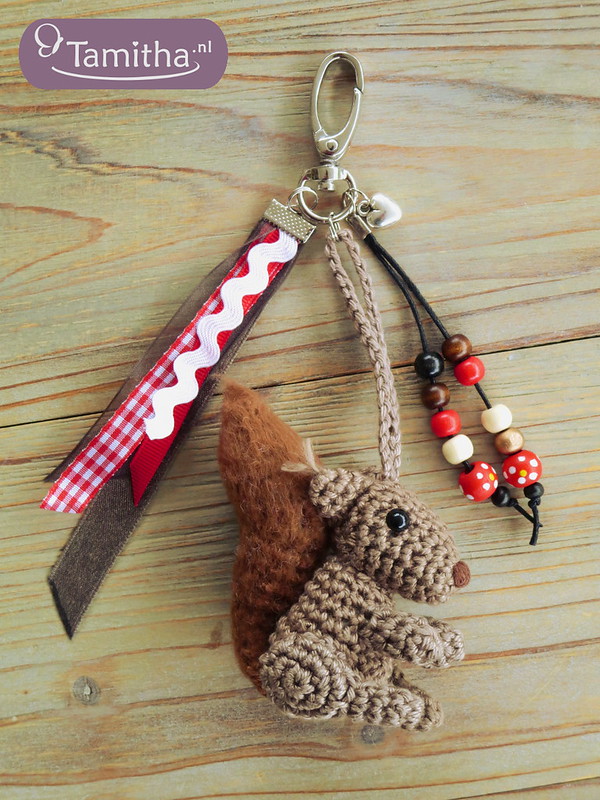
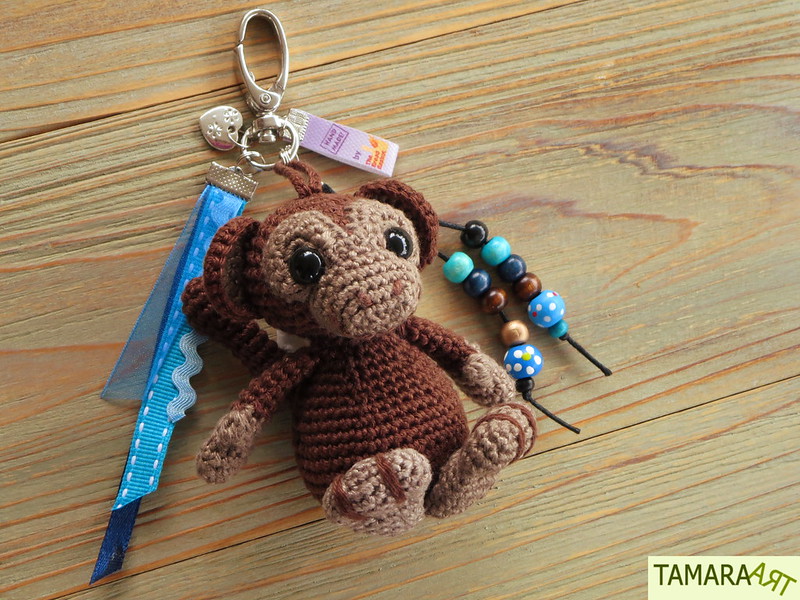
Het kleine aapje, dat ik al eerder had laten zien, was ook een deel van de bestelling. Ik heb het nu versierd met wat lintjes en kraaltjes. Samen met nog twee tashangers is de bestelling nu helemaal klaar om afgeleverd te worden!
The little monkey, which I have shown before, was also part of the order. I've decorated it with some beads and ribbons now. Together with two other bag charms, this order is ready for delivery!
De patroontjes zijn hier te vinden:
Dwergpapegaai (gratis)
Eekhoorntje (gratis)
Aapje (kooppatroon)
Poesje: Zie hieronder
Here's where you can find the patterns:
Lovebird (free)
Squirrel (free)
Monkey (payed)
Kitty: See below
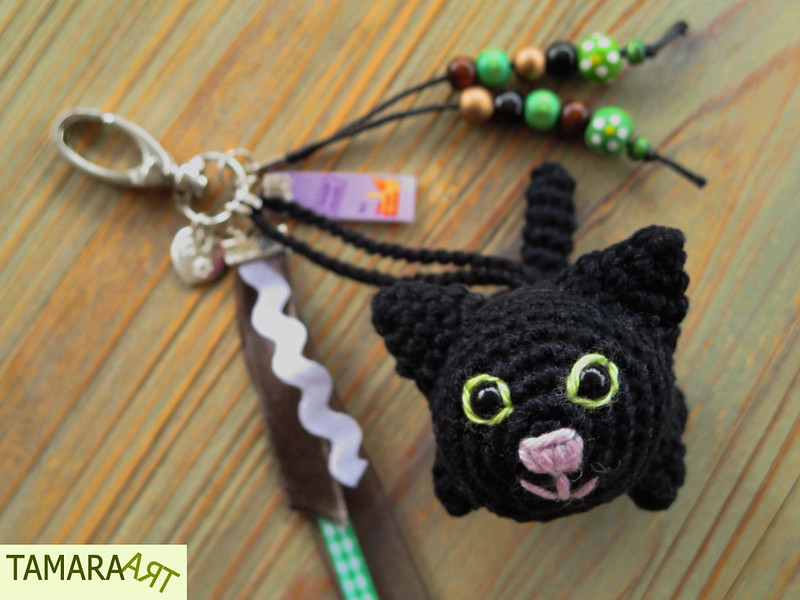
Het poesje heb ik ook zelf bedacht. Ik heb opgeschreven wat ik heb gedaan, je vindt de beschrijving hieronder. Ik heb het patroontje nog niet weer uitgetest. Mocht je een fout tegenkomen, laat het me dan maar even weten. =)
---
The kitty is something I also came up with myself. I kept notes of what I did, you'll find them below. I didn't test this pattern. If you find errors, please let me know. =)
Deze bestelling lag al heel (héél) lang half afgemaakt in mijn WIP mandje... Deze week heb ik hem eindelijk helemaal afgemaakt. Ze waren besteld door een collega, die zei dat ik rustig de tijd kon nemen. Gelukkig maar. =)
This order has been in my WIP basket for a long (looong) time... I finally got to finish it this week. My colleague ordered them, and she told me to take all the time I needed, fortunately. =)
Het kleine aapje, dat ik al eerder had laten zien, was ook een deel van de bestelling. Ik heb het nu versierd met wat lintjes en kraaltjes. Samen met nog twee tashangers is de bestelling nu helemaal klaar om afgeleverd te worden!
The little monkey, which I have shown before, was also part of the order. I've decorated it with some beads and ribbons now. Together with two other bag charms, this order is ready for delivery!
De patroontjes zijn hier te vinden:
Dwergpapegaai (gratis)
Eekhoorntje (gratis)
Aapje (kooppatroon)
Poesje: Zie hieronder
Here's where you can find the patterns:
Lovebird (free)
Squirrel (free)
Monkey (payed)
Kitty: See below
Het poesje heb ik ook zelf bedacht. Ik heb opgeschreven wat ik heb gedaan, je vindt de beschrijving hieronder. Ik heb het patroontje nog niet weer uitgetest. Mocht je een fout tegenkomen, laat het me dan maar even weten. =)
Kop
+ lichaam + staart
1.
6 vasten in verstelbare ring (6)
2.
[2 vasten in één steek] 6x (12)
3. [1 vaste – 2 vasten in één steek] 6x (18)
4. [2 vasten – 2 vasten in één steek] 6x (24)
5. [3 vasten – 2 vasten in één steek ] 6x (30)
6. vasten rondom (30)
7. vasten rondom (30)
8. vasten rondom (30)
9. vasten rondom (30)
10. vasten rondom (30)
11. vasten rondom (30)
12. [3 vasten – twee steken samenhaken met 1 vaste]
6x (24)
13. [2 vasten – twee steken samenhaken met 1 vaste]
6x (18)
14. [1 vaste – twee steken samenhaken met 1 vaste]
6x (12)
15. [2 vasten in één steek] 4x – [2 stokjes in één
steek] 6x – [2 vasten in één steek] 2x (24)
16. [3 vasten – 2 vasten in één steek] 6x (30)
17. vasten rondom (30)
18. [3 vasten – twee steken samenhaken met 1 vaste]
6x (24)
19. vasten rondom (24)
20. vasten rondom (24)
21. [2 vasten – twee steken samenhaken met 1 vaste]
6x (18)
22. vasten rondom (18)
23. [1 vaste – twee steken samenhaken met 1 vaste]
6x (12)
24. [twee steken samenhaken met 1 vaste] 6x (6)
25. vasten rondom (6)
26. 3 stokjes – 3 vasten (6)
27. vasten rondom (6)
28. vasten rondom (6)
29. vasten rondom (6)
30. vasten rondom (6)
31. vasten rondom (6)
32. vasten rondom (6)
33. vasten rondom (6)
Draad door alle lussen – aantrekken – afhechten
Oor 2x
1. 4 vasten in verstelbare ring (4)
2. vasten rondom (4)
3. [2 vasten in één steek] 4x (8)
4. [1 vaste – 2 vasten in één steek] 4x (12)
Afsluiten met een halve vaste – afhechten
Achterpoot 2x
1. 6 vasten in verstelbare ring (6)
2. vasten rondom (6)
3. vasten rondom (6)
4. vasten rondom (6)
5. [2 vasten in één steek] 6x (12)
6. [3 vasten – 2 vasten in één steek] 3x (15)
7. vasten rondom (15)
8. vasten rondom (15)
9. [3 vasten – twee steken samenhaken met 1 vaste]
3x (12)
10. [twee steken samenhaken met 1 vaste] 6x (6)
Draad door alle lussen – aantrekken – afhechten
Voorpoot 2x
1. 6 vasten in verstelbare ring (6)
2. vasten rondom (6)
3. vasten rondom (6)
4. vasten rondom (6)
5. vasten rondom (6)
6. vasten rondom (6)
Afhechten
Gebruik veiligheidsoogjes. Borduur rond elk oog een
groen draadje. Gebruik een roze draad om het snuitje te borduren.
---
The kitty is something I also came up with myself. I kept notes of what I did, you'll find them below. I didn't test this pattern. If you find errors, please let me know. =)
Head
+ body + tail
1.
adjustable ring with 6 single crochet (6)
2.
[2 single crochet in one stitch] 6x (12)
3.
[1 single crochet – 2 single crochet in one stitch] 6x (18)
4. [2 single crochet – 2 single crochet in one
stitch] 6x (24)
5. [3 single crochet – 2 single crochet in one
stitch] 6x (30)
6. single crochet all around (30)
7. single crochet all around (30)
8. single crochet all around (30)
9. single crochet all around (30)
10. single crochet all around (30)
11. single crochet all around (30)
12. [3 single crochet – crochet two stitches
together with 1 single crochet] 6x (24)
13. [2 single crochet – crochet two stitches
together with 1 single crochet] 6x (18)
14. [1 single crochet – crochet two stitches
together with 1 single crochet] 6x (12)
15. [2 single crochet in one stitch] 4x – [2 double
crochet in one stitch] 6x – [2 single crochet in one stitch] 2x (24)
16. [3 single crochet – 2 single crochet in one
stitch] 6x (30)
17. single crochet all around (30)
18. [3 single crochet – crochet two stitches
together with 1 single crochet] 6x (24)
19. single crochet all around (24)
20. single crochet all around (24)
21. [2 single crochet – crochet two stitches
together with 1 single crochet] 6x (18)
22. single crochet all around (18)
23. [1 single crochet – crochet two stitches
together with 1 single crochet] 6x (12)
24. [crochet two stitches together with 1 single
crochet] 6x (6)
25. single crochet all around (6)
26. 3 double crochet – 3 single crochet (6)
27. single crochet all around (6)
28. single crochet all around (6)
29. single crochet all around (6)
30. single crochet all around (6)
31. single crochet all around (6)
32. single crochet all around (6)
33. single crochet all around (6)
Yarn through all loops – pull – finish off
Ear 2x
1. adjustable ring with 4 single crochet (4)
2. single crochet all around (4)
3. [2 single crochet in one stitch] 4x (8)
4. [1 single crochet – 2 single crochet in one
stitch] 4x (12)
Join with slip stitch – finish off
Back leg 2x
1. adjustable ring with 6 single crochet (6)
2. single crochet all around (6)
3. single crochet all around (6)
4. single crochet all around (6)
5. [2 single crochet in one stitch] 6x (12)
6. [3 single crochet – 2 single crochet in one
stitch] 3x (15)
7. single crochet all around (15)
8. single crochet all around (15)
9. [3 single crochet – crochet two stitches together
with 1 single crochet] 3x (12)
10. [crochet two stitches together with 1 single
crochet] 6x (6)
Yarn through all loops – pull – finish off
Front leg 2x
1. adjustable ring with 6 single crochet (6)
2. single crochet all around (6)
3. single crochet all around (6)
4. single crochet all around (6)
5. single crochet all around (6)
6. single crochet all around (6)
Finish off
Use safety eyes. Embroider with green yarn around the
eyes. Use pink yarn to embroider the nose.
dinsdag 8 september 2015
Gehaakte schaal
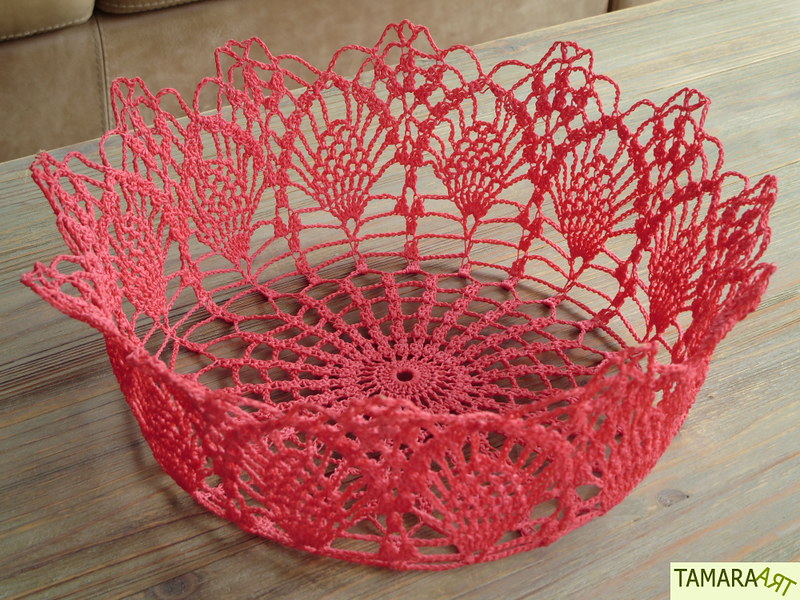
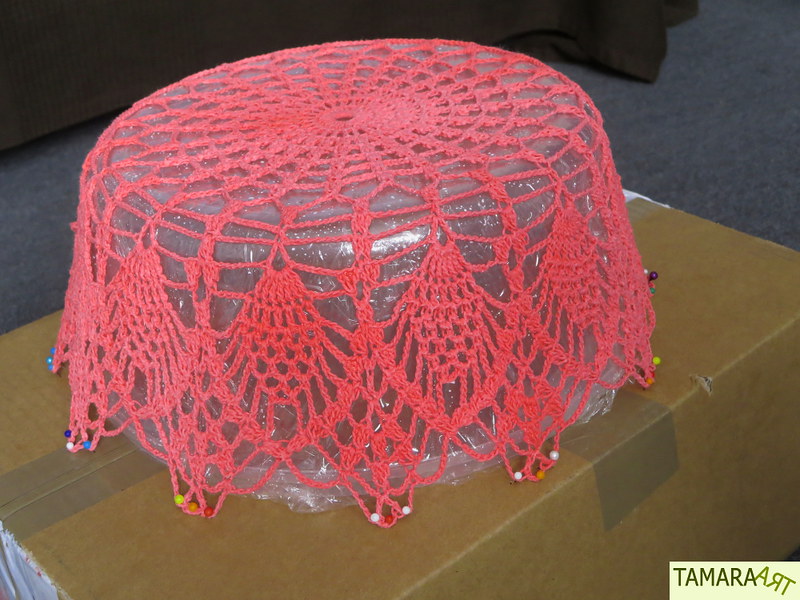
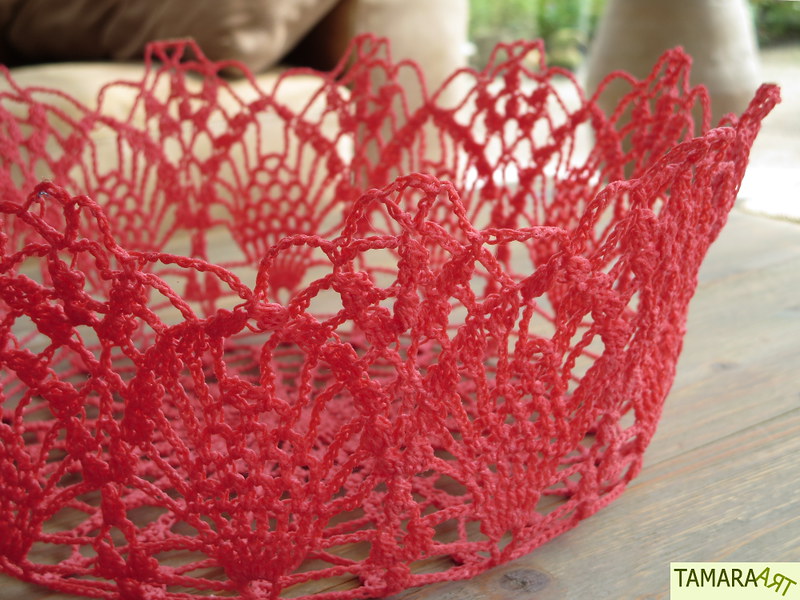
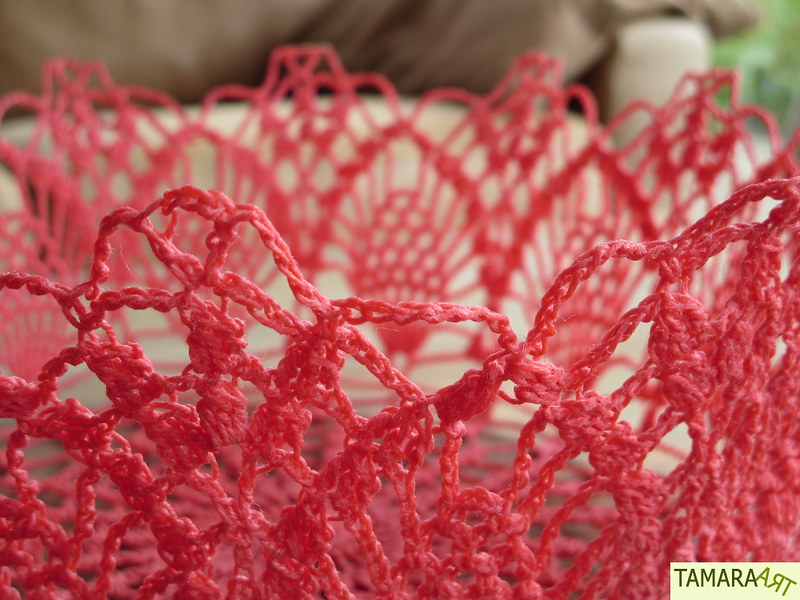
De laatste paar maanden ben ik bezig geweest met deze gehaakte schaal. Een leuk werkje om mee te nemen in de tas, en op een vrij moment even mee aan de slag te gaan.
The past few months I've been working on this crocheted bowl. It was a nice project to have in my purse and to work on whenever I had some time.
Ik heb gehaakt met garen dat iets dunner is dan de Catania wat ik vaak gebruik. Van mijn oudtante had ik een heel oud haaktijdschrift gekregen waar allemaal gehaakte kleedjes in stonden. Van één van die kleedjes heb ik het binnenste stuk gebruikt.
I used yarn that was a little bit thinner than the Catania I usualy work with. My great-aunt had given me some very old crochet magazines, which had a lot of doily patterns. I used the center part of one of those doilies.
Ik heb het kleedje verhard met houtlijm, met een klein beetje water er doorheen. Ik had een plastic schaal in folie gewikkeld, en daaroverheen het natte kleedje gelegd. Met een paar kopspelden heb ik de punten van het kleedje aan een kartonnen doos vastgespeld.
I stiffened the doily with wood glue, mixed with a little bit of water. I wrapped a plastic bowl in saran wrap, and put the wet doily on top of that. I pinned the top part to a cardboard box.
Een paar dagen laten drogen, en klaar was de schaal! Helaas is hij niet echt heel stevig geworden. Dus hij is niet echt geschikt om als schaal te gebruiken. Maar even nadenken wat ik er mee ga doen, misschien kan ik er nog een lampenkap van maken... =)
I let it dry for a few days, and that was it! Unfortunately it didn't get really stiff. So it's not really strong enough to be used as a bowl. I'll have to think about what to do with it, maybe I can use it as a lamp shade... =)
The past few months I've been working on this crocheted bowl. It was a nice project to have in my purse and to work on whenever I had some time.
Ik heb gehaakt met garen dat iets dunner is dan de Catania wat ik vaak gebruik. Van mijn oudtante had ik een heel oud haaktijdschrift gekregen waar allemaal gehaakte kleedjes in stonden. Van één van die kleedjes heb ik het binnenste stuk gebruikt.
I used yarn that was a little bit thinner than the Catania I usualy work with. My great-aunt had given me some very old crochet magazines, which had a lot of doily patterns. I used the center part of one of those doilies.
Ik heb het kleedje verhard met houtlijm, met een klein beetje water er doorheen. Ik had een plastic schaal in folie gewikkeld, en daaroverheen het natte kleedje gelegd. Met een paar kopspelden heb ik de punten van het kleedje aan een kartonnen doos vastgespeld.
I stiffened the doily with wood glue, mixed with a little bit of water. I wrapped a plastic bowl in saran wrap, and put the wet doily on top of that. I pinned the top part to a cardboard box.
Een paar dagen laten drogen, en klaar was de schaal! Helaas is hij niet echt heel stevig geworden. Dus hij is niet echt geschikt om als schaal te gebruiken. Maar even nadenken wat ik er mee ga doen, misschien kan ik er nog een lampenkap van maken... =)
I let it dry for a few days, and that was it! Unfortunately it didn't get really stiff. So it's not really strong enough to be used as a bowl. I'll have to think about what to do with it, maybe I can use it as a lamp shade... =)
zaterdag 5 september 2015
Vogeltjeshanger
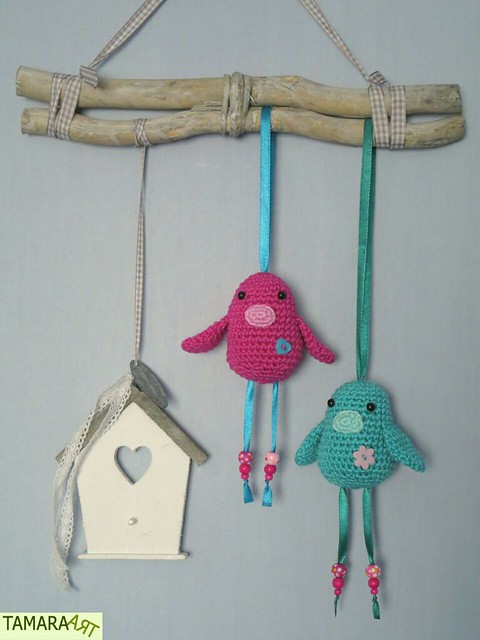
We hadden deze takkenbundel al een tijdje, maar hij was een beetje saai... Het leek me wel leuk hem wat kleurrijker te maken. Op internet had ik al verscheidene keren de vrolijke vogeltjes van "Dol op wol" voorbij zien komen, en het leek me altijd al leuk om die een keer te maken. Nu had ik er een mooie reden voor! Het vogelhuisje hing al aan de takkenbundel, en die heb ik laten hangen, want ik vond het er wel leuk bij passen. =)
We have had these decorative branches for a while, but they were kind of dull... I thought it would be fun to make them a bit more colorful. I had seen "Dol op wol's" birds many times on the internet, and I'd always wanted to make them. Now I had a good reason to do so! The bird house was part of the original branch set, and I left it there, because I figured they match the birds. =)
Patroon | Pattern: Dol op Wol
We have had these decorative branches for a while, but they were kind of dull... I thought it would be fun to make them a bit more colorful. I had seen "Dol op wol's" birds many times on the internet, and I'd always wanted to make them. Now I had a good reason to do so! The bird house was part of the original branch set, and I left it there, because I figured they match the birds. =)
Patroon | Pattern: Dol op Wol
dinsdag 18 augustus 2015
Tasjes, met voering!
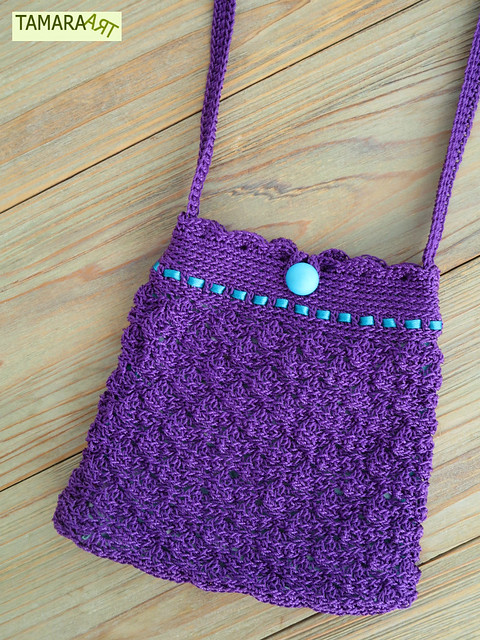
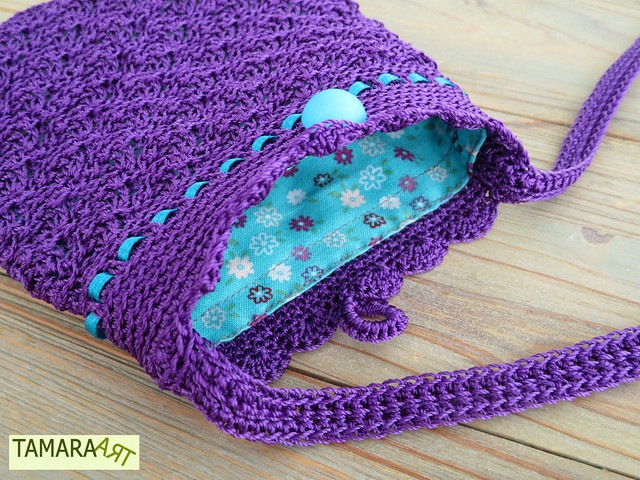
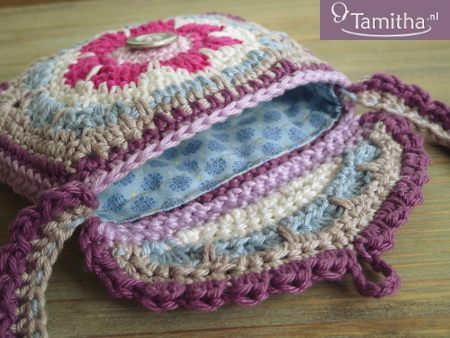
Ik ben gek op tassen! En heb er inmiddels dan ook al heel wat gehaakt! Het laatste tasje dat ik haakte had nogal grote openingen tussen de steken, dus daar moest eigenlijk wel een voering in. Toen ik die voering klaar had, had ik de smaak wel te pakken, en heb ik meteen ook maar voeringen genaaid in een paar andere tasjes die ik nog had liggen.
I love purses! And I have crocheted quite a lot so far! The last purse I made had large holes between the stitches, so it really needed a lining. Once I finished that lining, I really got into sewing, and made more linings for several other purses I still had laying around.
---
Het Fleurig Tasje patroon is te koop via: | You can purchase the Flowery Purse pattern at:
I love purses! And I have crocheted quite a lot so far! The last purse I made had large holes between the stitches, so it really needed a lining. Once I finished that lining, I really got into sewing, and made more linings for several other purses I still had laying around.
Het patroontje van dit tasje vind je hier:
Here is the link to the pattern of this purse:
Ik heb niet zoveel verstand van naaien, dus ik heb een tutorial gevolgd voor het maken en vastnaaien van de voering. Deze tutorial vind je hier: Naai een voering in een gehaakte tas
I don't know much about sewing, so I followed a tutorial on how to make and sew a lining into the purse. You can find that tutorial here: Sew a lining into a crocheted bag
Dit Fleurige Tasje heb ik al eens eerder laten zien, maar hij is nu ge-upgrade met een mooie voering:
I've showed this Flowery Purse before, but it has been upgraded now with a pretty lining:
---
Het Fleurig Tasje patroon is te koop via: | You can purchase the Flowery Purse pattern at:
Etsy -------------------- (directe download / instant download)
Ravelry ---------------- (directe download / instant download)
KOOP HET NU: Fleurig Tasje (Geen account nodig, directe download, je kunt via PayPal betalen)
BUY IT NOW: Flowery purse (No account needed, instant download, you can pay through PayPal)
---
Abonneren op:
Posts (Atom)